How to automate Windows updates with PowerShell?
PowerShell Script
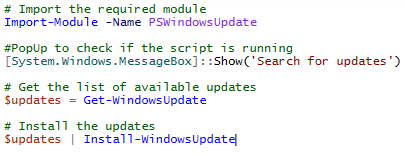
# Import hte required module
Import-Module -Name PSWindowsUpdate

# Get the list of available updates
$updates = Get-WindowsUpdate

# Install the updates
$updates | Install-WindowsUpdate
In this example, the Import-Module cmdlet is used to import the PSWindowsUpdate module, which provides cmdlets for managing Windows updates. The Get-WindowsUpdate cmdlet is used to retrieve a list of available updates, and the Install-WindowsUpdate cmdlet is used to install the updates. The $updates variable is used to store the list of available updates, and the pipeline operator (|) is used to pipe the list of updates to the Install-WindowsUpdate cmdlet.
You can also use the Get-WUList cmdlet to retrieve more detailed information about the available updates, and the Get-WUInstall cmdlet to install specific updates.
Add a task in the Task Scheduler
First, search in the Windows search bar for the Task Scheduler and open it. Then right click on Task Scheduler (Local) and Create Task. 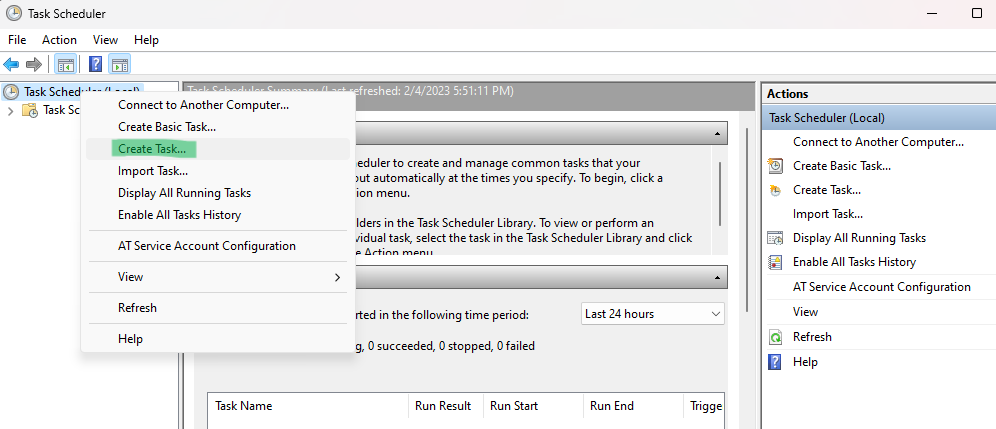
Fill out following sections: 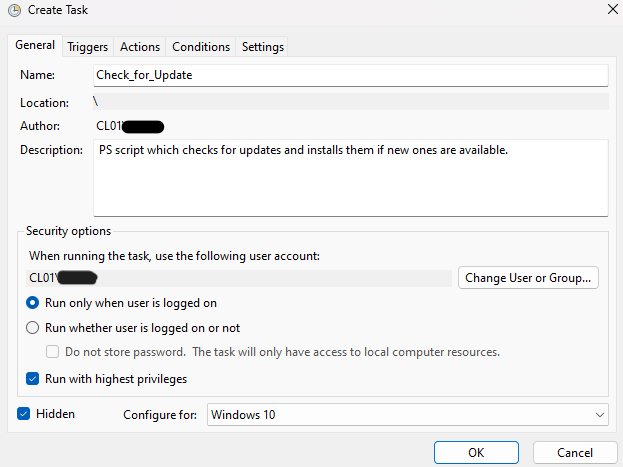
Then set a Trigger. Go to Triggers and then New...: 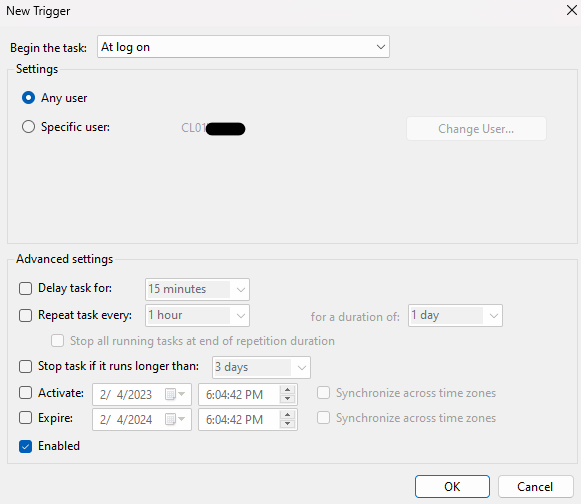
Next, go to Actions and then New.... The only thing you have to do is to set the path of the script:
You can leave the Conditions and Settings section as they are. To create the task click OK.
Tipp: If you want to check if the script is executed with a PopUp. Add the following line to your Script:
[System.Windows.MessageBox]::Show('Search for updates')So my Script looks like this:
Add a task in the Task Scheduler with PowerShell
Coming soon...
Testing
To test your task, you have to restart or shut down your computer because you set as trigger "on logon". After logging in you can open the Task Scheduler again and under Task Status you should see your task. Also the PopUp should appear with the Text "Search for updates".
Congratulations, you have created an automatic Windows Update Checker with Powershell and registered a task in the Task Scheduler!